 Pagal World
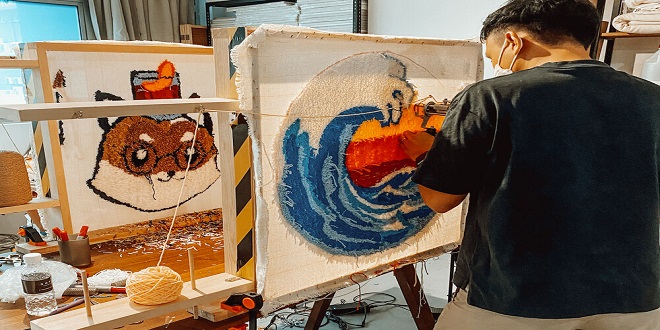
A tufting gun is a tool used to create a rug by inserting yarn into a backing. The tufting gun has a long needle that is inserted into the backing. The yarn is then wrapped around the needle and pulled tight to create a knot.
How to Use a Tufting Gun
The tufting gun is a simple machine that helps you weave fabric through a series of holes to create a rug. You can make a variety of different rugs with this tool, depending on the fabric and design you choose. Click here to check more.
To use the tufting gun, you’ll need:
– A piece of fabric at least twice as wide as the finished rug will be
– Ruler or tape measure
– Pen or pencil
– Scissors
– Tufting gun
- Cut your fabric to the desired size. You will want to leave an extra few inches on each side so that you have enough to work with.
- Measure and mark the center of the fabric. This is where your rug will start and end.
- Draw a line perpendicular to the center mark, dividing the fabric into four equal parts.
- Sew a small hem along each of the two shorter edges of the fabric. This will keep the fabric from fraying when you tuft it.
- Set up your tufting gun according to the manufacturer’s instructions.
- Put the fabric right side up on a flat surface and place the tufting gun at one of the corners, so that the needle is facing down towards the fabric.
- Push down on the pedal to activate the gun and begin weaving the fabric through the holes. Keep going until you reach the opposite corner, then do another row starting in the middle and weaving in both directions until you’ve coverd the entire piece of fabric.
Materials Needed
You will need:
-A tufting gun
-Rug canvas or foam
-Yarn or fabric
-Scissors
-Hot glue gun
-Pins
-Measuring tape
-Ruler or a straight edge
Tufting Gun Tips and Tricks
Now that you know what a tufting gun is and how it works, here are a few tips and tricks to help you get the most out of your tufting gun.
– Use a good quality backing material. This will ensure that your rug lasts for years to come.
– Use a strong adhesive. This will ensure that your tufts stay in place.
– Be sure to evenly space your tufts. This will give your rug a professional look.
– Use a different color thread for each row of tufts. This will add interest to your rug and make it unique.
following these tips, you’ll be sure to create a beautiful and long-lasting rug that you can enjoy for years to come.
Making Your Own Rug
Now that you have all of your materials, it’s time to get started on making your very own rug! Here’s a quick overview of the steps you’ll need to take:
– Step 1: Cut your fabric into strips that are about 1-2 inches wide.
– Step 2: Attach the fabric strips to the tufting gun using the clips or hooks that come with it.
– Step 3: Insert the pointed end of the tufting gun into the fabric strip and pull the trigger to fire a tufting needle through the fabric.
– Step 4: Continue firing tufting needles into the fabric strip until it is completely covered.
– Step 5: Repeat steps 1-4 until you have enough fabric strips to cover the entire surface of your rug.
– Step 6: Once you have tufted all of your fabric strips, trim any excess fabric from the edges of the rug.
And that’s it! Now you have a beautiful, one-of-a-kind rug that you made yourself.
FAQs About Tufting Guns
Q: What is a tufting gun?
A: A tufting gun is a power tool that helps you create a professional-looking Rug. It has a needle that pierces through the fabric and a plunger that secures the yarn in place.
Q: Do I need a tufting gun to make a Rug?
A: No, you can tuft by hand, but it will take longer and the results won’t be as consistent. A tufting gun will give you much better results and it’s definitely worth the investment if you’re serious about making Rugs.
Q: What kind of needle should I use with my tufting gun?
A: The size of the needle will depend on the thickness of the fabric you’re using. For most fabrics, a size 18 or 20 needle will work well.
Q: How do I secure the yarn in place?
A: Once you’ve inserted the needle through the fabric, pull on the yarn to make sure it’s secure and then press down on the plunger to lock it in place.
Conclusion
So, there you have it! With a little bit of patience and the right tools, you can easily make a beautiful, professional-looking rug at home. And, who knows? Once you get the hang of it, you might even find yourself making all kinds of custom creations for your home—or even for others.